When it comes to creating a beautiful, lush lawn, proper preparation is key. Before laying down your turf or grass seed, there are a few important steps you need to take to ensure the health and longevity of your lawn. One crucial step is to prepare the soil by adding the right materials and nutrients.
Before laying your lawn, it is essential to remove any existing vegetation, such as weeds or old grass. This can be done by manually pulling them out or using herbicides. Once the area is clear, it’s time to prepare the soil. One popular method is to till the soil, breaking it up and creating a loose, friable surface that will allow roots to penetrate easily.
After tilling the soil, it’s important to add organic matter, such as compost or well-rotted manure. This will improve the soil structure, drainage, and nutrient content. Organic matter also encourages beneficial soil microorganisms and earthworms, which aid in the decomposition of organic material and promote overall soil health.
In addition to organic matter, applying a pre-planting fertilizer can provide essential nutrients that may be lacking in the soil. Look for a fertilizer with a balanced ratio of nitrogen (N), phosphorus (P), and potassium (K), as this will promote healthy root development, strong growth, and overall vigor of the lawn.
By taking these steps to prepare the soil before laying your lawn, you will create an optimal environment for your turf or grass seed to establish and thrive. Investing time and effort in this preparation stage will result in a beautiful, healthy lawn that you can enjoy for years to come.
Preparing the Ground

Before laying a new lawn, it’s crucial to properly prepare the ground to ensure healthy growth and longevity. Proper ground preparation allows for good drainage, nutrient absorption, and strong root establishment. Here are the steps to take to prepare the ground for laying a lawn:
1. Clear the Area
Start by clearing the area of any existing vegetation, such as grass, weeds, or plants. This can be done by using a lawnmower, weed trimmer, or a shovel to remove the top layer of growth. It’s important to eliminate all traces of weeds and grass to prevent any competition with the newly laid lawn.
2. Test the Soil
It is essential to test the soil to determine its pH level and nutrient content. This can be done using a soil testing kit or by sending a sample to a professional laboratory. Testing the soil will provide valuable information about its current condition and allow for any necessary amendments to be made.
Note: Most lawns prefer a slightly acidic soil with a pH level between 6 and 7.
3. Improve Drainage
If the soil has poor drainage, it may be necessary to improve it before laying the lawn. This can be done by incorporating organic matter, such as compost or well-rotted manure, into the soil. Organic matter helps improve soil structure, allowing for better water infiltration and drainage.
4. Level the Ground
Next, ensure that the ground is level and smooth. Use a rake or garden roller to remove any bumps, dips, or uneven areas. This step is crucial for achieving an even and professional-looking lawn.
5. Add Organic Fertilizer
Before laying the lawn, it’s beneficial to add organic fertilizer to the soil. This will provide essential nutrients for the new grass to establish and thrive. Follow the instructions on the fertilizer package for the correct application rate.
By following these steps, you can prepare the ground effectively for laying a new lawn. This will create the optimal conditions for the grass to grow healthy and vibrant, resulting in a beautiful and lush lawn.
Removing Existing Vegetation
Before laying a new lawn, it is important to remove any existing vegetation to ensure a clean, even surface. This step is crucial to prevent weeds and other unwanted plants from competing with the new grass for nutrients and sunlight.
There are several methods you can use to remove existing vegetation:
1. Manual Removal:
One of the most basic methods is to manually remove the existing vegetation using a shovel or a spade. This method is suitable for small areas or patches of unwanted vegetation. Dig out the plants, including their roots, and dispose of them properly.
2. Herbicides:
If you have a larger area to clear, you may consider using herbicides. Look for a herbicide that is specifically designed to kill the type of vegetation you want to remove. Follow the instructions provided on the product carefully to ensure safe and effective use.
3. Tilling:
Tilling is another effective method to remove existing vegetation. Use a power tiller or a garden fork to break up the soil and uproot the plants. This method not only removes the vegetation but also helps improve the soil’s structure, making it easier for the new grass to establish its roots.
4. Smothering:
For a chemical-free approach, you can try smothering the existing vegetation. Cover the area with a thick layer of cardboard, newspaper, or a black plastic sheet. This will deprive the plants of sunlight and eventually kill them. However, keep in mind that this method may take several weeks or even months to completely kill the vegetation.
Once you have successfully removed the existing vegetation, make sure to clear any debris and level the surface before proceeding with laying the new lawn. This will ensure an optimal growing environment for your new grass.
Leveling the Surface
Before laying lawn, it is essential to level the surface to ensure a smooth and even base for the grass to grow on. A properly leveled surface not only improves the appearance of the lawn but also minimizes the risk of water pooling and uneven growth.
Assessing the Surface
The first step in leveling the surface is to assess its current condition. Check for any dips, bumps, or uneven areas that need to be addressed. Use a straight board or a level to identify problem spots and measure the depth of any significant variations.
Additionally, consider the overall slope of the area. Ideally, you want a slight slope to allow for proper drainage. If the area is too sloped, there may be a need for additional leveling measures such as adding or removing soil to achieve a more even surface.
Adjusting the Surface
Once problem areas have been identified, it’s time to adjust the surface. For minor dips or bumps, you can simply add or remove soil as needed. Fill in low areas with topsoil and compact it down to create a level surface.
For more significant variations, it may be necessary to use leveling tools such as a rake or a leveling bar. These tools will help to distribute excess soil from high areas to the lower spots, creating a level surface.
Note: It is important to keep in mind that the soil should be properly compacted after any adjustments to ensure stability and prevent settling in the future.
Tip: If the surface requires substantial leveling, it may be beneficial to use a rototiller to loosen the soil and mix in any amendments such as compost or sand. This will help create a more fertile and well-drained base for the lawn.
Adding Soil Amendments
Before laying a lawn, it’s important to prepare the soil properly. One key step in the preparation process is adding soil amendments. Soil amendments are materials that are added to the soil to improve its structure, fertility, and overall health.
There are several types of soil amendments that can be used, depending on the specific needs of the soil. Some common types of amendments include:
| Compost | Compost is a mixture of decomposed organic matter, such as leaves, grass clippings, and kitchen scraps. It improves soil fertility, drainage, and water-holding capacity. |
| Peat Moss | Peat moss is a partially decomposed layer of sphagnum moss that is harvested from bogs. It helps to improve soil structure, retain moisture, and provide nutrients. |
| Manure | Manure, such as cow or horse manure, is a rich source of organic matter and nutrients. It improves soil fertility and adds beneficial microorganisms. |
| Perlite | Perlite is a lightweight, volcanic glass material that helps to improve soil aeration and drainage. It also helps to prevent compaction. |
When adding soil amendments, it’s important to ensure that they are mixed thoroughly into the existing soil. This can be done by tilling or digging the amendments into the soil to a depth of 6-8 inches. The amount of amendments needed will depend on the current condition of the soil and the specific recommendations for the chosen amendment.
By adding soil amendments before laying a lawn, you can create an optimal environment for healthy grass growth, ensuring that your lawn will thrive for years to come.
Installing a Weed Barrier
Installing a weed barrier is an important step when laying a lawn. A weed barrier helps prevent the growth of unwanted weeds and maintains a well-maintained and visually appealing lawn. Here are the steps to install a weed barrier:
1. Prepare the soil: Before installing a weed barrier, ensure that the soil is properly prepared. Remove any existing weeds, grass, or debris from the area. Use a rake or a garden fork to loosen up the soil and remove any rocks or large clumps.
2. Measure and cut the weed barrier: Measure the area where you want to install the weed barrier and cut the fabric accordingly. Make sure the fabric is large enough to cover the entire area, including the edges.
3. Lay the weed barrier: Lay the weed barrier fabric over the prepared soil. Smooth out any wrinkles and make sure it fits snugly against the ground. Overlap multiple pieces of fabric by at least 6 inches to ensure complete coverage.
4. Secure the weed barrier: Use garden staples or landscape pins to secure the weed barrier fabric to the ground. Place the staples or pins every 2 to 3 feet along the edges and in the center to prevent the fabric from shifting or lifting.
5. Cut holes for plants: If you plan to plant anything in the area, cut X-shaped holes in the weed barrier fabric using a utility knife. Make sure the holes are large enough to accommodate the root ball of the plant.
6. Cover the weed barrier: Once the weed barrier is secured in place, cover it with a layer of mulch, wood chips, or gravel. This not only helps to further prevent weed growth but also adds an aesthetic appeal to the lawn.
By following these steps and installing a weed barrier, you can create a healthy and weed-free lawn that will require less maintenance and look great for years to come.
Watering and Preparing for Lawn Installation
Proper preparation and watering are essential for a successful lawn installation. Before laying down the sod or grass seeds, it’s important to ensure that the soil is well-prepared and ready for planting. Follow these steps to ensure a healthy and vibrant lawn:
1. Soil Preparation
The first step in preparing the soil is to remove any existing vegetation, such as weeds or old grass. This can be done by manually pulling them out or by using an herbicide. It’s important to ensure that the area is clear of any obstacles that may hinder the growth of the new lawn.
Next, it’s important to loosen the soil to a depth of at least 6 inches. This can be done using a garden fork or tiller. Loosening the soil will improve drainage and allow the roots to penetrate easily.
After loosening the soil, it’s important to amend it with organic matter such as compost or peat moss. This will improve the soil structure and provide essential nutrients for the new lawn.
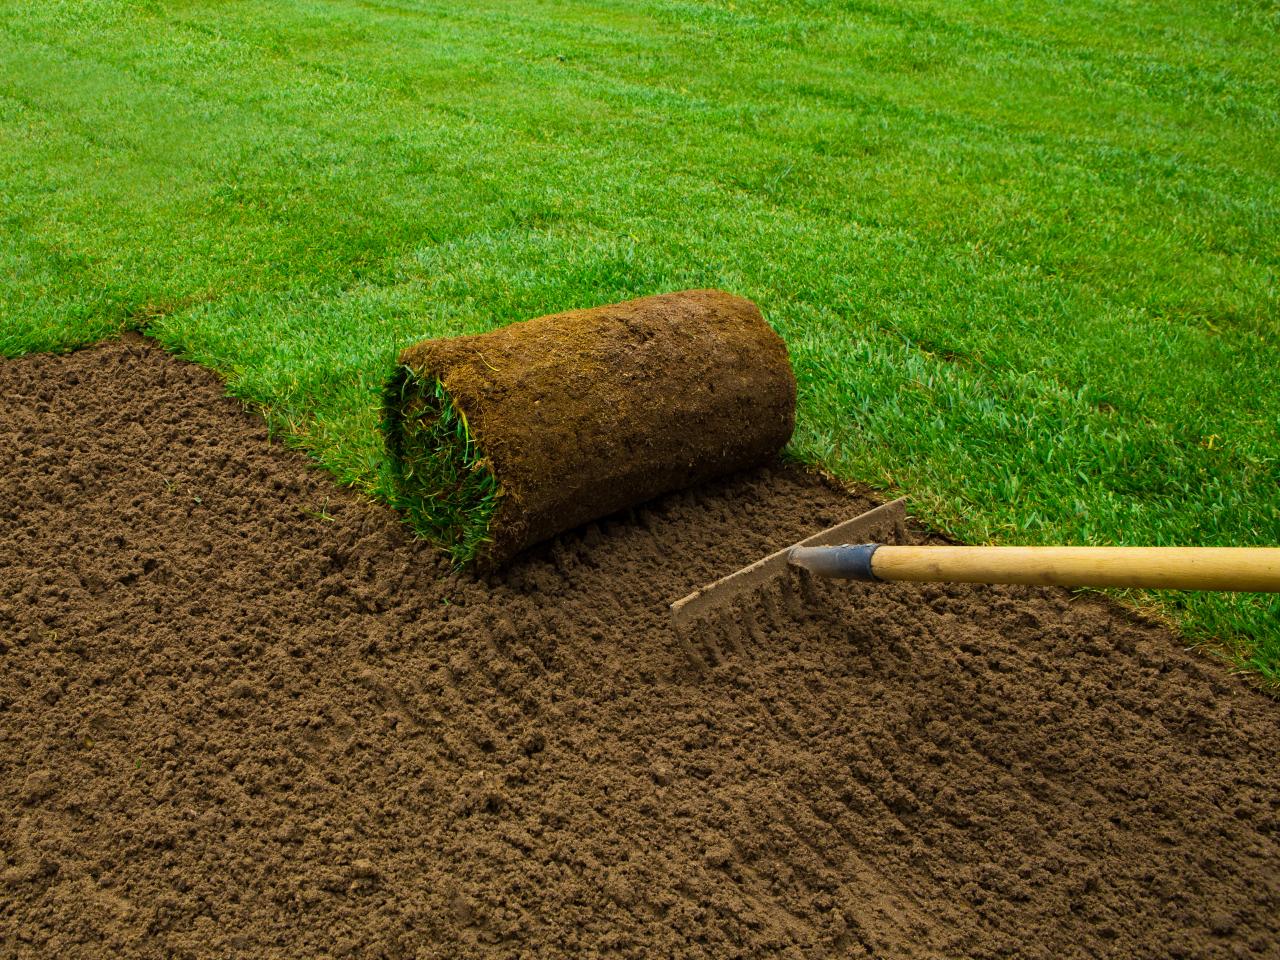
2. Leveling and Raking

Once the soil is prepared, it’s important to level the area to ensure a smooth and even surface for the lawn. Use a rake or leveling tool to remove any bumps or indentations.
After leveling, rake the soil to create a fine texture. This will provide a good seedbed for the grass seeds or a solid base for the sod.
3. Watering
Before laying the sod or sowing the seeds, it’s important to thoroughly water the soil. This will ensure proper moisture levels for germination and establishment.
After watering, wait for the soil to dry slightly. This will prevent the soil from being too muddy and make it easier to work with.
During the lawn installation process, it’s important to water the sod or seeds regularly. This will help the roots establish and ensure healthy growth. Water deeply but infrequently to encourage deep root growth.
Remember to adjust the watering schedule as the new lawn becomes established. Gradually reduce the frequency of watering as the grass becomes more established and able to withstand longer periods without water.
By properly preparing the soil and watering appropriately, you can ensure the successful installation and establishment of your new lawn. Follow these steps for a lush and healthy lawn for years to come.